Speed Up AWS Lambda using GraalVM
Introduction
Building Lambdas in AWS is one of the central aspects for building serverless systems in AWS. However, as AWS Lambda removes a lot of problems for developers when building systems, it also introduces a number of new problems developers have never had to deal with before.
The Number One Complaint developers have when building AWS Lambdas with Java are "cold starts".
A cold start occurs the very first time a AWS Lambda is asked to handle a request. Now, depending on the size of your Lambda function, it could take 10 seconds or more just for the Java process to start. For some applications, this may be an acceptable trade-off for the benefits AWS Lambda brings, but for most serverless applications, or for Lambdas that handle a large number of requests, this is unacceptable, and often makes developers abandon AWS Lambda and/or Java and go back to the technologies they are most familiar with.
AWS has tried to address cold starts by introducing features like Provisioned Concurrency. However, this defeats the goal of "serverless" computing because you are no longer just paying for requests, you are also reserving compute capacity, and when you exceed this capacity you will incur the same cold starts you would have had otherwise.
The only way to fix cold starts is to get Java to start faster. Luckily, Oracle has created a new project called GraalVM. GraalVM is a new Java VM that can be used to improve the performance and to reduce the startup time of applications.
In this tutorial, we will be creating a simple Lambda function that writes a file to an S3 bucket. Actually, we will create that Lambda twice, once using Java without GraalVM, and again with GraalVM, to be able to compare performance.
What You Need for this Tutorial
- About 30 minutes
- A favorite text editor or IDE
- AWS CLI
- AWS SAM CLI
- Docker Desktop
- JDK 11 or later
- Gradle 4 or later
- Access to an AWS account with access to deploy SAM CLI
Note: The full Source Code for this Tutorial is available on GitHub
Step 1: Create a New Project using SAM CLI for a our Java and GraalVM Lambdas
AWS SAM CLI is a command line tool that makes it easy to create and deploy serverless applications. We are going to use the SAM CLI to first create a AWS Lambda function in Java, and then we will convert that Lambda function to use GraalVM. The last step will be to compare the performance of these two Lambda functions.
To create the project, run the following command in a terminal window, under a new directory (e.g., ./graalvm-tutorial):
Answer the questions as follows:
This should lead to the following output:
You have now created a SAM project with a single Lambda function. In your current directory you should see a subdirectory called "graalvm-s3" that will contain the project generated by the SAM CLI.
Step 2: Create the Java Lambda (without GraalVM)
In the ./graalvm-s3 directory, you will see a HelloWorldFunction subdirectory, which is the default Lambda function that was generated from SAM. We are now going to create our first Lambda function using Java, without GraalVM.
The first function will be called S3Java, so our first step is to take over the sample function by renaming the HelloWorldFunction directory to S3Java:
We also need to update the file template.yaml to use the new Lambda name and to add instructions for both creating the S3 bucket we will be writing our test file into, and for setting the Lambda function permissions to allow read/write for this new bucket:
The Lambda function created by SAM comes with a few classes we will not need. You can delete the following files:
- S3Java/src/main/java/helloworld/App.java
- S3Java/src/main/java/helloworld/GatewayResponse.java
- S3Java/src/test/java/helloworld/AppTest.java
We will create the new Lambda function in S3Java/src/main/java/helloworld/S3Java.java:
We need to add the official AWS S3 dependency to S3Java/build.gradle for the code to compile:
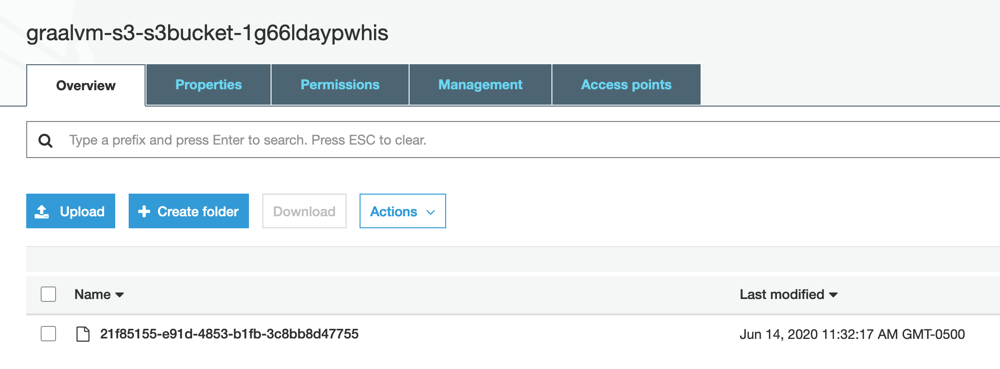
This Lambda function is very simple: it identifies an S3 Bucket by name from the environment, and then it creates a random file in that bucket with the message "This is a test".
Step 3: Build, Deploy, and Run the Java Lambda (without GraalVM)
To build and deploy this Lambda function, run the command in a terminal window, in the same directory where the template.yaml file is located:
This produces the following output:
To deploy this Lambda function, run the following command using the same terminal window and directory:
This produces the following output:
SAM CLI will create and deploy a CloudFormation Stack to your AWS Account. This will take a few minutes, but at the end you should see this message:
You can confirm the CloudFormation Stack was created by visiting the CloudFormation Console or by using the following AWS CLI command:
A StackStatus "CREATE_COMPLETE" shows that the CloudFormation was successful. In the CloudFormation Outputs, you will see the ARN of the Lambda function we will use to run the Lambda function, as well as the S3 Bucket the files will be written to.
We can run the Lambda function by using AWS CLI with the command:
This will run the Lambda function and write the output of the function to a file called output. Viewing that file, you should see something similar to the following:
Now the last thing we need to know is how long this Lambda function takes to execute. The easiest way to see this is using the AWS CLI. Using this command will show the CloudWatch logs for the Lambda function:
You can also visit the CloudWatch Console. The output should be similar as below (we are looking for the Duration time):
We can see that it took 10400 ms, or 10.4 seconds, to execute this Lambda function. That is not very good, but we now have a time baseline. Once we convert this Lambda to GraalVM, we'll be able to see if anything changes.
Step 4: Create the GraalVM Java Lambda
We are going to create a new Lambda function called S3GraalVM based on the existing S3Java. So, you should copy the S3Java folder and call it S3GraalVM:
Now, delete the file S3GraalVM/src/main/java/helloworld/S3Java.java and create S3GraalVM/src/main/java/helloworld/S3GraalVM.java using the code below:
From a code perspective, the only change is setting the System Property software.amazon.awssdk.http.service.impl. The AWS SDK by default uses Apache & Netty for its HTTP service calls. This adds a ton of extra classes, and for AWS Lambda, this means slower startup times. Luckily, as of AWS SDK 2.0, we can change the SDK to use Java's built-in URLConnection class instead.
We then need to update our build.gradle to add url-connection-client, and exclude the apache-client and netty-nio-client, so they are not included in our final build:
Using a "FAT" Jar File
GraalVM needs to be run against a "FAT" jar file, i.e., a single jar file that contains all code and dependencies. We will use the com.github.johnrengelman.shadow gradle plugin to easy accomplish this. Also, we will be using Lambda's custom runtime, so we need to use FormKiQ's open source GraalVM Lambda Runtime library.
Add the following to build.gradle:
Step 5: Build, Deploy, and Run the GraalVM Java Lambda
GraalVM works by taking the "FAT" jar file and creating a Linux executable file that AWS Lambda can run. Unfortunately, GraalVM does not support all the features of Java. This is not generally a big deal, but one important feature it does not support without modification is Reflection. Because the FormKiQ GraalVM Lambda Runtime needs reflection to find the Lambda function to run, we need to use GraalVM's ReflectionConfigurationFiles. In this file we can define any classes we will be calling using reflection, and GraalVM will automatically add support for these classes.
Create the file S3GraalVM/src/main/resources/reflect.json, defining our Lambda class inside:
Create file S3GraalVM/build_graalvm.sh, a shell script which will use Docker to convert the S3GraalVM-all.jar to an executable called server. (Make sure you give the build_graalvm.sh execute permission.)
Add a task to build.gradle that will build the GraalVM image automatically when the project is built:
Once we have the GraalVM image, AWS requires a bootstrap file to be able to execute the Lambda function.
Create the file ./S3GraalVM/bootstrap, a script which will be bundled with the Lambda function and that AWS will call to execute the Lambda function. (Make sure you give build_graalvm.sh execute permission.)
We are almost done, the last thing we have to do is configure AWS SAM Cli to build our custom runtime. This is done though a Makefile. The Makefile is pretty simple, it just builds the gradle project and copies the server and bootstrap files to the SAM build directory.
Create file S3GraalVM/Makefile with the following code:
Note: if you get the error Makefile:4: *** missing separator, it's because Makefile need to use TABS and not spaces to indent.
Lastly, update the template.yaml file to include our new Lambda function:
Build the Lambda function by running the command in a terminal window, in the directory where the template.yaml file is located (it will take a few minutes for GraalVM to build the project):
This produces the following output:
Deploy the Lambda function by running the command in the same terminal window and folder:
This products the following output:
As with the Java Lambda above, we can use the AWS CLI to run the GraalVM Lambda function:
The output of the Lambda function will be written to a file called "output", with content similar to:
To view Cloudwatch logs: , you should see the following:
You should see something similar to this:
As you can see, switching our Java Lambda function to use GraalVM has brought the duration from a cold start of over 10 seconds to one that takes less than half a second.
Summary
We built two Lambda functions, one using standard Java 11 and a second using GraalVM. We found that using GraalVM the runtime for our Lambda function went from over 10 seconds down to less than half a second.
If you want to learn more in detail about why AWS Lambda functions written in Java are slow, you can watch this video, "Best practices for AWS Lambda and Java" from AWS Reinvent 2019: